<a href="menu.shtml">Table of Contents</a>
<br>
Lesson 5: Colored Masks
This lesson will walk you through creating a Happy Birthday mask with colored balloons.
This lesson assumes that you remember the basic steps of lessons 1 through 4.
- Load PhotoELF's Editor
- Look in the Fun Stuff menu and select New Image (blank)
- Select a size of 800 x 600 pixels and a black background color. Then, click OK
You now should be looking at a black rectangle
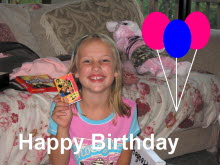
- Using the Shapes and Text tool panel, select a circle shape and draw several ovals (balloons) on the black rectangle.
Make them different colors.
- Add some white strings to the balloons by using the line shape.
- And if you like, add some white text.
You should now be looking at something like this:
- Colored masks are inverted when applied (in other words, they become their negative). So we need to invert this
image by clicking the Negative Invert button:
You should now be looking at something like this:
- Look in the File menu and select: Save as Mask
- All Done
- Close the Editor, load a photo and test your new mask.
When you apply this new mask, remember the following:
When dealing with any mask that has a color, you want to select white as your mask color in the mask window.
Any other color will give it a tint of color that you select. White will be neutral and allow the original image color to show through.
As a fun test, load a photo into the Editor and click the Mask button on the toolbar.
Select your new mask.
Try different colors in the mask color palette and see the results in the preview window.
Mask Rule: When dealing with colored masks, if you
want the original mask colors to show through, always select white as your applied color in the Mask window.
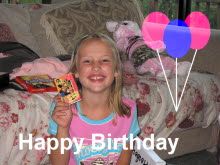
If you use white as your color, your photo should look like this:
After you have applied this mask to a photo, you will note that it blends into the underlying photo and is semi-transparent.
(You can see through the balloons to the underlying photo. This is because masks merge with the photo.
Mask Rule: Colored masks apply poorly to lighter colored photos and apply better to darker colored photos. The darker the
background, the more opaque (non see-through) the mask will be.
A neat trick to get around this and cause the background to always be black:
Create a second mask from the first (by painting in the colored portion to be black) as in this sample:
Then, when you go to apply your mask, do the following steps:
- Apply the blackened mask first, using black as your selected color
- Press the Keep button in the Mask window
- Then apply your colored mask using white as your selected color.
- Click Apply and Exit
Doing this, will cause the balloons, strings and text to be opaque instead of semi-transparent. As in the sample below:
|
|
|
|
Original mask only
|
Black mask used first
|
Note that in the original mask, the balloons are semi-transparent, whereas in the second example they are opaque.
Next Lesson: Lesson 6: Double Exposure Mask
Home
Privacy Policy
PhotoELF
Download PhotoELF